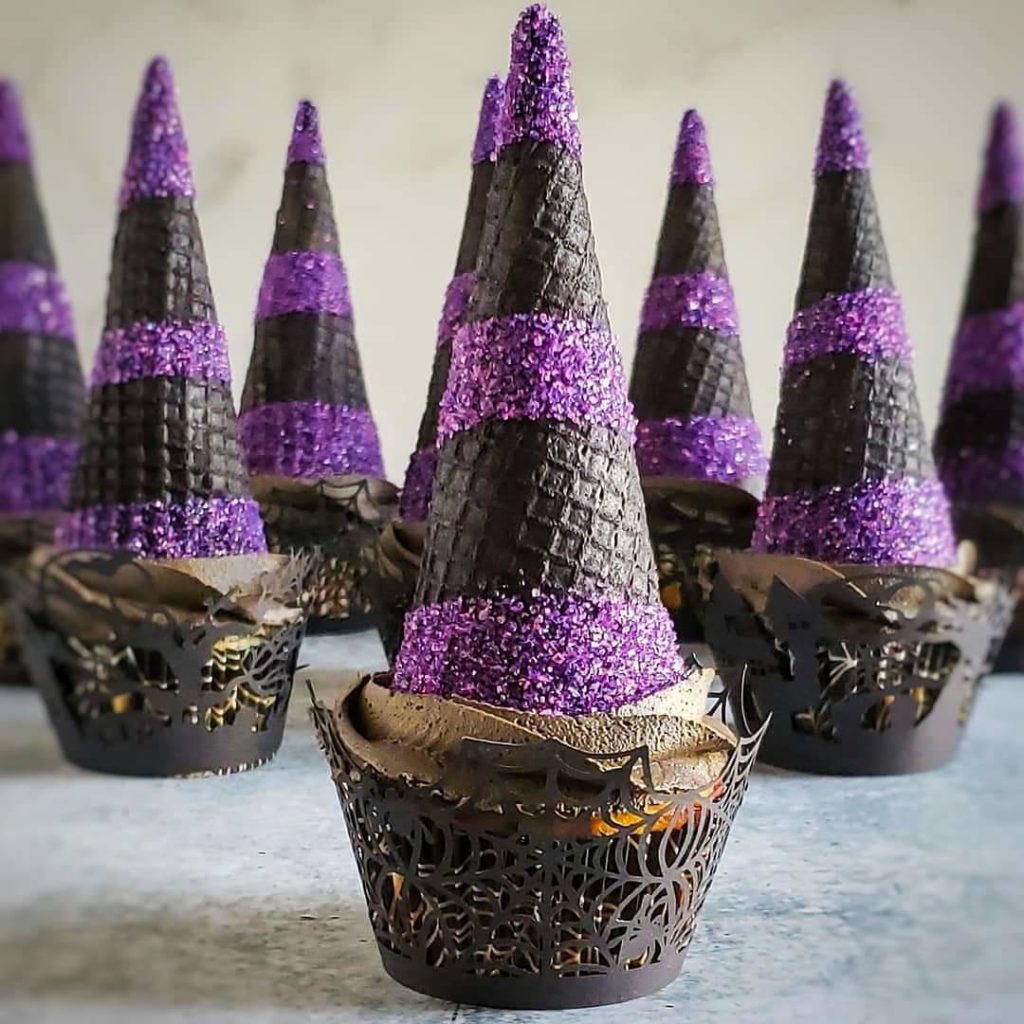
There are so many opportunities to be creative with Halloween baking. Today I’m going to show you how to make several varieties of witch hat cupcakes using ice cream cones!
First, you’ll need cupcakes. I recommend these pumpkin cupcakes with chocolate cream cheese buttercream frosting. Dye the frosting black using black food dye. For a darker color, let the frosting sit in the refrigerator overnight. (For all but the purple-striped hats, my frosting isn’t as black as I’d like because I ran out of food dye.)
Quick note about food dye. Not all food dye is gluten free, so if that’s an issue for you be sure to check the labels. I actually can’t eat these cones because the Wilton color sprays I used contain wheat.
Either use black cupcake wrappers or a decorative liner like these, which I found at Michael’s last year.
Note: I earn a small commission every time you make a purchase through an affiliate link. But there’s no extra cost to you! Thank you for supporting Roses & Whiskers.
You’ll also need ice cream cones and edible food spray. Black, orange and purple are the colors I used, but feel free to get creative. If you’re looking for gluten free cones, I recommend these. As noted above, the Wilton sprays I used are not gluten free. Chefmaster has gluten free options here, here and here.
Other supplies:
- purple sanding sugar
- orange sanding sugar
- Halloween sprinkles (pictured here, Sprinkle Pop’s “Monster Mashup” mix
- wax paper
- scissors
- tape
- ruler
- paper bags, cardboard or something else to put on your counter to avoid a mess
- disposable gloves, if you have them! I dyed my hands all kinds of colors. Haha.
Let’s start with the striped hats, because those are the most involved.
Step 1: Cut out strips of wax paper. Do as many stripes as you like, but I think five is the sweet spot. Use a ruler to be more exact, or estimate. You can reuse the wax paper strips or cut enough for each cone. Having enough for each cone is the cleanest way to go, which is what I did for the purple stripes.
*Helpful hint: Because the cones curve, the wax paper strips should curve, too. The easiest way to do this is to cut them straight, pull them around the cone and then trim accordingly. If you’re a geometry wiz and have a simpler solution please let me know!
Step 2: Tape two or three wax paper strips around the cone, pulling the strips as tightly as possible. The spray may bleed a little under the wax paper, but don’t worry. That can be fixed. You’ll be starting with the black spray, so determine how many of each color stripe you want.
Step 3: Spray the black on the cone, trying not to get too much on the wax paper (again, to avoid bleeding as much as possible). Remove the wax paper and let sit for 5 to 10 minutes.
Step 4: Spray orange or purple to fill in the other stripes. There’s no need for wax paper at this stage because the other colors won’t show up against the black.
Immediately sprinkle on orange or purple sanding sugar, which will add a little sparkle and clean up the stripes. Use your fingers or a toothpick to brush off errant sparkles.
All of the other witch hat variations are similar. Spray them a solid color and either leave as is or add an assortment of sanding sugars or sprinkles. Small sprinkles will easily stick to the wet spray.
Stick on larger sprinkles with a little dab of frosting.
Pipe a rosette onto your cupcakes using Wilton tip 1M and let it sit for about 5 minutes. Then place the cone on top. And you’re done!
Tag me @rosesandwhiskers on Instagram if you try these witch hat cupcakes and use the hashtag #rosesandwhiskers. Happy baking! 🙂


[…] Dress them up for Halloween by adding ice cream cone witch hats! Find the tutorial here. […]