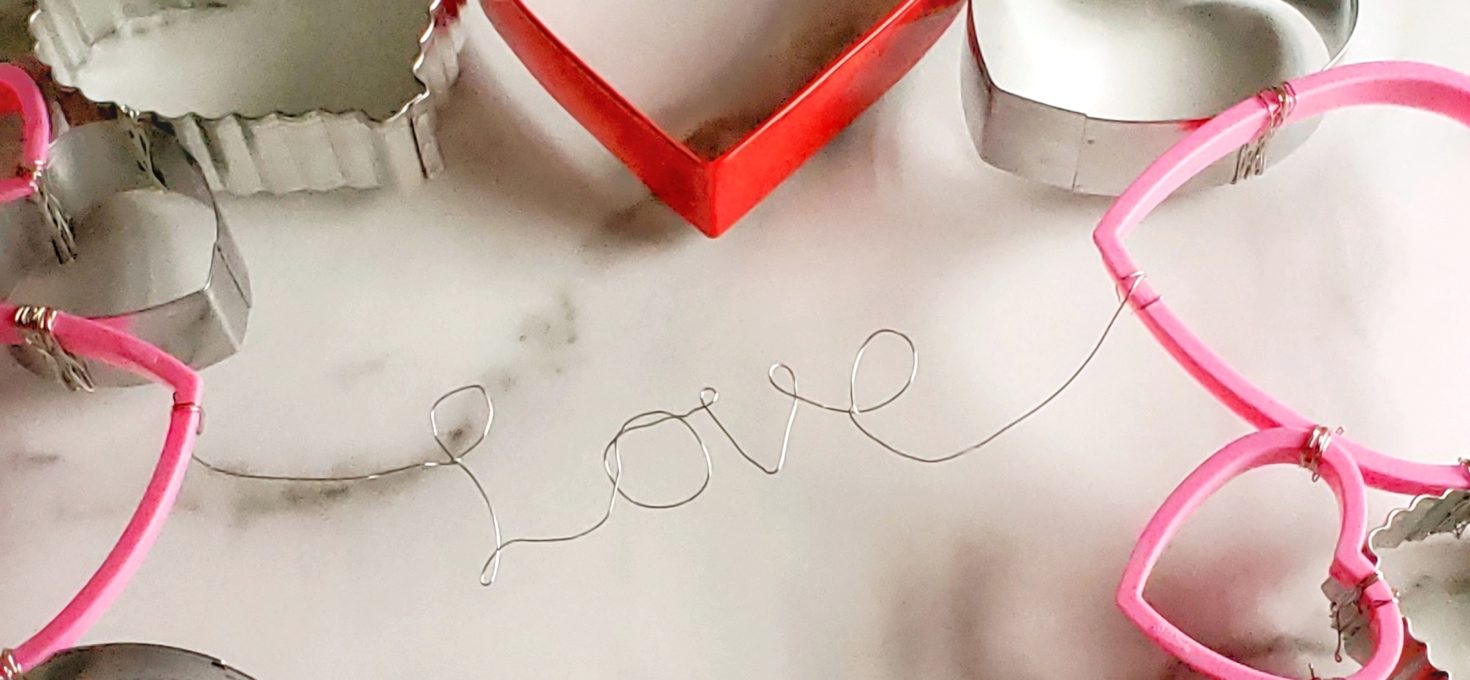
One cute way to say “I love you” to your favorite baker this Valentine’s Day is with this adorable cookie cutter wreath. And if your favorite baker is you, make it for yourself! 🙂
You can make the wreath with or without the wire letter writing. You can also customize it to say something other than “Love.” Just don’t be intimidated. Writing with wire is actually easier than it looks! You can follow my tutorial and do it freehand, or you can print out letters to trace. Tracing cursive printouts is how I learned to write with wire.
What You’ll Need:
12-16 heart cookie cutters (the number you need depends on their size)
24-gauge silver wire
ribbon
scissors
needle nose pliers
cutting pliers
(This post contains affiliate links. I may receive a small commission, at no cost to you, if you make a purchase through a link. My full affiliate disclosure and privacy policy is available here.)
The first step is arranging your cookie cutters in a wreath formation. Take a picture of the arrangement you like best so you can easily recreate it.
Next, use your cutting pliers to cut 8-inch pieces of wire. You’ll want two 8-inch pieces when connecting one pair of cookie cutters.
Use the needle nose pliers to fold the end of each wire piece. (This is because the ends of the wire are sharp and you don’t want to cut yourself.)
Now you’re ready to form the wreath! Wrap one piece of wire around the sides of two cookie cutters to connect them. Then wrap a second piece on top of the first piece. You can either tuck the ends under a piece of wire and/or use the needle nose pliers to flatten and tighten it.
Continue connecting cookie cutters until the wreath is finished. Then you’re ready to “write”! Cut a 24-inch piece of wire and fold over the ends like you did above.
Lay the piece of wire horizontally on a table or another flat surface. Leaving 4 inches of wire overhang on the left, fold the right end to form a small loop (see below).
Wrap it around again to form a “knot” and use the needle nose pliers to tighten it. Lay the wire so that the right end is vertical to the small loop.
Fold the wire up to form a smaller loop so that the right end piece is now laying horizontally in an “L” shape. Use the needle nose pliers to smooth out any kinks in the wire.
Now let’s form the “o.” Start by folding the right end up into a half circle shape.
Continue wrapping the wire around until it forms an entire “o.” The wire should overlap like in the image below.
Gently tuck the wire underneath the right side of the “o.” Don’t tighten it or pull too hard. But you can use the needle nose pliers to flatten any kinks in the wire.
The right end of the wire should be sticking straight up from the “o.” Fold it down to form a small loop. The end of the wire should now be sticking down.
Form a “v” shape with the wire. The wire should be sticking up again. Fold the top down to form another small loop (see the image below) and use the needle nose pliers to smooth out any kinks.
You’re almost there! To make the “e”, fold the right end of the wire to form a slightly larger loop. If you know what an “e” looks like, then you’ve got this! Curve the end to finish the shape. Loop the end back through the middle of the “e” to form a “knot” like you did with the “L.” And you’re done! You should have an extra 4 inches of wire on either end.
Wrap the ends of the wire around two cookie cutters so that “Love” is in the middle of the wreath. Use the needle nose pliers to tighten the wire around the cutters.
Cut a 36-inch piece of ribbon and tie it around one of the cookie cutters to form a bow. And there you have it! A cute holiday decoration or gift for a loved one.
Feel free to ask me if you have any questions! Tag me @rosesandwhiskers on Instagram and use the hashtag #rosesandwhiskers if you try it. Happy crafting! 🙂


