Do you ever see something on Pinterest and think to yourself, “I can make that”? That didn’t start happening to me until recently. I became obsessed with Pinterest two years ago while I was planning my wedding, but at first it only gave me ideas of things I could buy. I found a gorgeous cake topper that linked to Etsy. I showed it to one of my friends, and she said something like, “That’s way too expensive! I can make that for much less.”
And so began my DIY wedding. I learned so much from my friend and slowly became more confident in my crafting abilities. I’ve since branched out on my own and am loving my newly discovered craftiness.
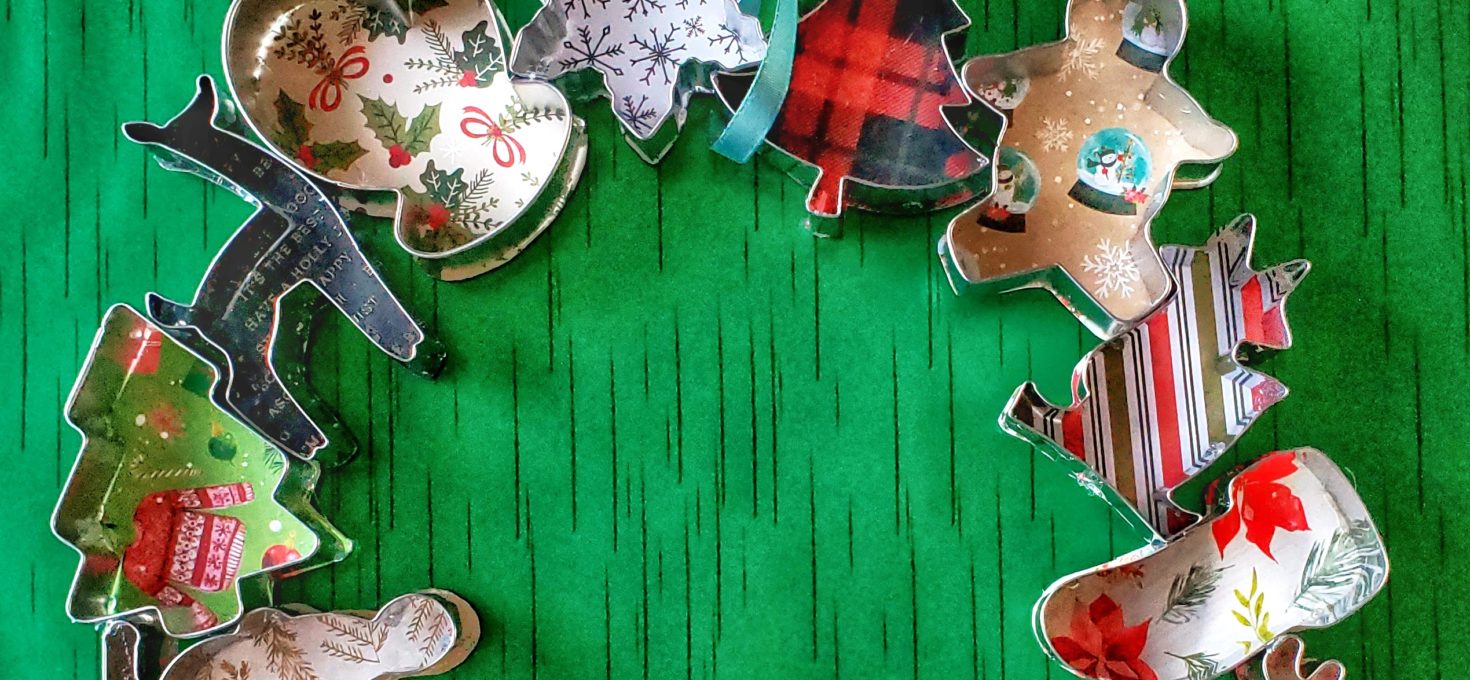
Last year I saw a cookie cutter wreath on Pinterest and thought, “I’d love to make that.” When that wreath popped into my head this year I thought, “I can make that”! And you can make one, too.

What You’ll Need:
12-16 cookie cutters (how many you need depends on their size, but I used 14)
craft paper (I used a different piece for each cutter but you do you)
glue gun
ribbon
scissors
pencil
scrap cardboard
I bought the cookie cutters and craft paper at Michael’s.

The first thing you should do is arrange the cookie cutters into a wreath shape. It will take some trial and error to figure out the best arrangement, and you might end up changing your mind a few times. Take a picture of the arrangement you like so that you remember the order. Then decide what craft paper you want to put behind each cutter.

Trace each cutter on the white side of the craft paper so the lines are easy to see. This is important: Decide which side of the cutter you want facing front, and then trace the opposite side. Otherwise the shapes won’t line up on the colorful side of the paper. Do this even if the cutter looks symmetrical.
Cut each shape slightly outside the line you traced. You want a little bit of extra space when you’re gluing it onto the cookie cutter.

Use a glue gun to attach the craft paper to the back of each cookie cutter. You only need a few drops of glue on each side. Work quickly, because the glue will dry fast. You can trim excess paper on the edges and peel off any dried glue that ran down the side. If you’re neater than I am then maybe your glue won’t drip!

Now it’s time to glue the cookie cutters together. Refer to the picture you took earlier and form the wreath shape. Make sure you’re happy with the arrangement before you start gluing. Glue the cutters together, one at a time, making sure the wreath keeps the shape you want.
After I finished gluing the cookie cutters together I decided they needed a little bit more support. My mother-in-law suggested gluing strips of cardboard onto the back, which worked like a charm. I used pieces of an Amazon box.

Finally, loop a piece of ribbon around the top of the wreath and tie a bow so you can hang it on the wall. I suggest double knotting!

Tag me @rosesandwhiskers on Instagram if you make it and use the hashtag #rosesandwhiskers. This wreath would also be a cute present for a baker in your life!
Happy crafting.


That is so cute! Thank you for your great tutorial!
Thanks for reading!! Glad you like it!
[…] cookie cutter wreath ~ roses and whiskers […]